Professional Photography in Linux, Part 1
Part 2 of the Linux photography workflow is here.
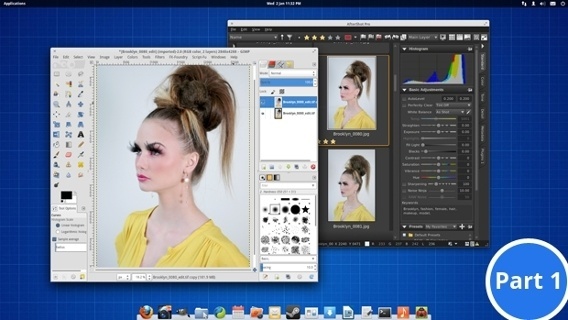
Can a professional photographer really work in Linux?
I edited all of my images from a photoshoot in Ubuntu 12.04 to determine if it is possible for a professional photographer to create a workflow entirely in Linux.
It required both open source and closed source software, but I was able to do it all with native Linux applications. There is no dual booting, no WINE, and no virtual machines used in this workflow.
Step 1: Monitor Color Calibration
Software: Gnome Color Manager, or dispcalGUI
The first step in a professional photography workflow is to calibrate your monitor’s color with a device called a colourimeter. This is mandatory because the colors on your screen need to be accurate. Seriously, this is crucial. Don’t skip this step.
For those unfamiliar with color managed workflows, there is a ton of great information here.
How to calibrate your monitor in Linux:
Method 1, Quick and Easy
If you are using Ubuntu 12.04, this is super easy. Just plug in your colorimeter and the calibration screen opens up. Click the ‘Calibrate’ button and follow the steps on the screen. That’s it. There is no need to install drivers or software.

The Datacolor Spyder 3 Pro works out of the box in Ubuntu 12.04
If the screen doesn’t automatically pop up, go to your System Settings, choose Color, then click the Calibrate button in the bottom right. Keep in mind that if your colorimeter is not plugged in, the Calibrate button will not be clickable. So plug in your device first.

This should work with most colorimeters. My Datacolor Spyder 3 Pro worked no problem. If your colorimeter doesn’t work out of the box, try Method 2. And if you want to avoid compatibility issues all together, buy a ColorHug :) It’s an open source display colorimeter.
How to calibrate your monitor in Linux:
Method 2, Advanced Settings
If you are not running Ubuntu 12.04, have an unsupported colorimeter, or you just want more features like ambient light measurement, install dispcalGUI. Just follow their quick start guide and you’ll be calibrating in a few minutes.
Please keep in mind that with either method you use, the color profile you create will only be good for a short time. As monitors age, their color changes. So you need to recalibrate about once a month to maintain accurate colors.
Step 2: Download Photos, aka Ingest
Software: Rapid Photo Downloader
I was so happy when I finally discovered Rapid Photo Downloader to download and rename my photos.

Rapid Photo Downloader is a Linux replacement for PhotoMechanic’s ingest and rename feature
A fundamental part of my workflow in OS X/Windows is a program called PhotoMechanic. It downloads all my photos very quickly, renames them, embeds important metadata, and is a fantastic color managed image viewer that includes a rating system. Rapid Photo Downloader will take care of the downloading and renaming.
While my photographs are being downloaded to my computer (aka ingest), the photos must be renamed to fit the naming conventions of my archiving system. For example, Date-YYMMDD_Event_Name_Sequential_Number.file-type, ie:
120725_Pearl_Jam_Concert_001.jpg
120725_Pearl_Jam_Concert_002.jpg
120725_Pearl_Jam_Concert_003.jpg
This becomes incredibly import when managing large photo/asset archives like I do at work. Rapid Photo Downloader is the only Linux program I have found that does this properly.

My typical settings for renaming photos in Rapid Photo Downloader
I often dump multiple memory cards full of photos to the same folder, so I use the Downloads Today renaming feature, or the Stored Number feature which can be set to any number I choose in Preferences => Rename Options.
Rapid Photo Downloader can also automatically create backups to a destination of your choice during the download, and has many other great features. There is and older version in the Ubuntu 12.04 repositories, or you can download the latest version via PPA.
Step 3: Embedding Metadata
Software: gThumb
Because my photos are often published in various newspapers, magazines, and websites, there is important metadata that needs to be embedded in the photographs.
This isn’t the EXIF metadata that includes camera information like shutter speed, aperture, and iso. It’s the IPTC metadata like keywords, description, copyright information, and photographer credit, etc. This information needs to be embedded inside each photo so people working at the various news outlets know the “who, what, where, and why” of the shot.

An example of important IPTC metadata stored inside a photo (as seen in Photoshop)
Along with the IPTC and EXIF metadata, I also need to include keywords so the photos are easily searchable in the large archives I keep. These can also be referred to as tags.
I do all this in gThumb, which is available in the Ubuntu repositories or via PPA. Simply launch the application, navigate to your folder of images in the directory tree in the left panel, select all the images, click the ‘Comment’ button (or Ctrl+M, or Edit => Comment), type in all your information in the General and Other tabs, then click ‘save’.

I use gThumb to embed IPTC information like description, copyright, photo credit, and keywords
Now all the photos have the proper metadata embedded inside, and people running Photoshop and other programs will be able to read it.
Other Software Options:
For KDE users (or Gnome users who don’t mind installing a bunch of KDE dependencies), digiKam is also a great option to complete several of the functions I mention here. If KDE is your cup of tea, check it out.

")


17 Comments
fookoffdisqus
July 5, 2014I know this is an old thread but a lot of the info is still relevant. However an update might be helpful.
gThumb doesn’t work with RAW files so yeah it ain’t work sh*t to a professional If I’m honest. Also in Ubuntu 14.04 the monitor calibration fails even though it sees both my Spyder 2 and ColorMonki Display, not sure if that’s a gnome (ubuntu 14.04) kernal issue or something else. I’ll try a default 14.04 and 12.04 install in a virtualbox. However if you do happen to still have Windows installed you can drop into that, calibrate your monitor then import the icc profile into your Linux box.
Magnus Berg
January 10, 2013First: I recommend Geeqie as image browser instead of Gthumb becuase the former has support for color management. Isn’t that a good ting for a professional? ;-)
Second: Ladislav Ezr wrote in his comment that “Aftershot is only 32bit and have absolutely no integration with Ubuntu”. It integrates well with Ubuntu (I supppose. I run Debian and it workes great there.) if you install and run a multiarch environment. Google “Ubuntu + multiarch”
rileybphoto
January 12, 2013Yes, color management is top priority, so Geeqie is a good recommendation. But if you read the post, the only thing I am using gThumb for is embedding metadata into the photos. Nothing else. I actually use Aftershot Pro as my photo viewer.
I also find that ASP integrates fine in Ubuntu. But then again, I am running Gnome Shell and Gala, not Unity. The 32bit part is definitely a huge strike against ASP though.
B.S.
June 17, 2013Integration with the OS is irrelevant. Adobe doesn’t integrate with Windows. Non-issue. Now the app itself …
Bit Chest
November 11, 2012Might I suggest this tool in addition to your workflow: http://bit-chest.com/index.php/photo-workflow/
It’s not entirely open source (and I am the owner), but you might still some use for it!
Beck
August 31, 2012I do pro work with a total Open Source work flow! I love Linux and Darktable…and the list goes on!
CFHowlett
August 1, 2012Hope you don’t mind that I shared your write up with the Ubuntu Studio email list…
rileybphoto
August 2, 2012Not at all. I think it’s great.
I am happy to hear the word is spreading about the article. And the Ubuntu Studio crowd sound like just the kind of people who might be interested in it.
Esteban Cuevas
August 1, 2012@rileybphoto:disqus nice article!. Great tips. Didn’t know about all those apps.
A question: what’s the theme are you using with gnome-shell (on the pictures, the last one, and some examples here).
I think shell it’s zukitwo (the logo, top-left corner), but what it is the GTK+ and Window Theme you’re using?. Looks like adwaita (even has the awaita corner’s buttons) but more grey and not too much whitey like the original adwaita. Can you tell?… please :)
Thanks again for the tips ;)
rileybphoto
August 1, 2012Thanks, I am glad you learned something.
You actually guessed the theme well. The GTK and shell themes are Zukitwo, and the window theme is Adwaita.
micha
August 1, 2012Have you seen XnView : http://newsgroup.xnview.com/viewtopic.php?f=60&t=26033 you can work faster then with gThumb
rileybphoto
August 1, 2012Thanks for the tip.
I’d never heard of XnView before. I’ll check it out.
Ladislav Ezr
August 2, 2012I think that getdeb.net have the latest version BTW. Also this app is another resource hog, it can easily eat 4GB of RAM with 4 – 5 RAWs open.
There is also XnConvert, the best converting app on Linux. It can convert photos to everything, even to formats like WebP (superior to .jpg BTW), Jpeg2000 etc.
valgrid
November 11, 2012I think its not floss
klaatu
August 1, 2012i checked out darktable recently and was really impressed with it, as well. you can apply filters and modifications without ever touching the original file. Quite nice.
rileybphoto
August 1, 2012I’ve heard good things. I haven’t tried it in a long time. I am comfortable in Aftershot Pro right now, and I can use it on my Mac at work, so I don’t think I will change anytime soon. But it’s great to know there are more options out there.
Ladislav Ezr
August 2, 2012It’s sad that Aftershot is only 32bit and have absolutely no integration with Ubuntu :/